

How to set up a textile loom?
Oct 20, 2026
Leave a message
Hey there! I'm a supplier of textile looms, and I'm super excited to share with you how to set up a textile loom. Whether you're a newbie in the textile world or just looking to expand your knowledge, this guide will walk you through the process step by step.
Understanding the Basics
Before we jump into the setup process, let's quickly go over what a textile loom actually is. A textile loom is a device used to weave fabric by interlacing two sets of threads – the warp (the lengthwise threads) and the weft (the crosswise threads). There are different types of looms out there, like the Air Jet Loom and the Rapier Loom. Each type has its own unique features and advantages, but the basic setup principles are pretty similar across the board.
Preparing Your Workspace
The first thing you need to do is find a suitable workspace for your loom. You want a space that's clean, well-lit, and has enough room for you to move around comfortably. Make sure the floor is level and stable, as an uneven surface can cause problems with the loom's operation.
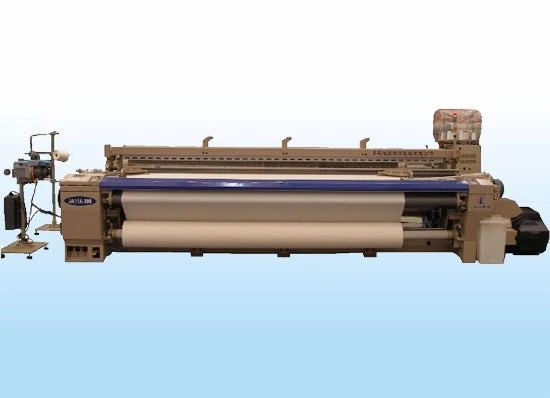
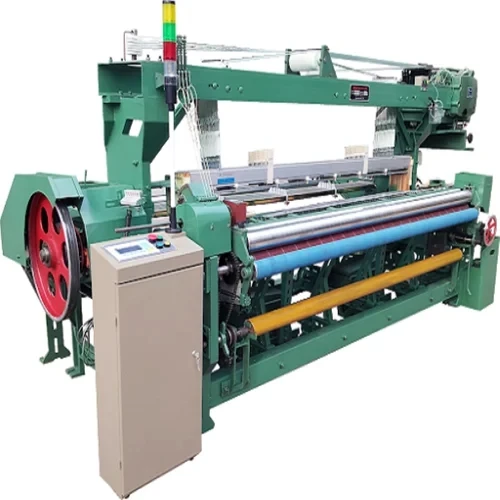
Next, gather all the tools and materials you'll need for the setup. This includes things like a measuring tape, a pair of scissors, a comb for separating the warp threads, and of course, the loom itself. It's also a good idea to have a copy of the loom's instruction manual handy, just in case you run into any questions along the way.
Unpacking and Assembling the Loom
Once you've got your workspace ready, it's time to unpack the loom. Carefully remove all the parts from the box and lay them out on a clean surface. Take a few minutes to familiarize yourself with each part and make sure you have everything you need.
Now, it's time to start assembling the loom. Most looms come with detailed assembly instructions, so follow them carefully. Start by attaching the frame pieces together, making sure they're securely fastened. Then, install the warp beam, which is the large cylinder that holds the warp threads. Next, attach the heddles, which are the small loops that the warp threads pass through. Finally, install the reed, which is the comb-like structure that helps to keep the warp threads evenly spaced.
Warping the Loom
Warping is the process of winding the warp threads onto the loom. This is one of the most important steps in the setup process, as it determines the width and length of your fabric.
To start warping, you'll need to measure out the length of the warp threads. This will depend on the size of the fabric you want to weave. Once you've measured the length, tie one end of the warp threads to the back beam of the loom. Then, use a warping board or a warping mill to wind the threads onto the beam in an even and orderly manner. Make sure the threads are tightly wound and that there are no gaps or overlaps.
After you've wound the warp threads onto the beam, it's time to thread them through the heddles and the reed. This can be a bit tricky, but with a little patience and practice, you'll get the hang of it. Start by threading the first warp thread through the first heddle, then through the first dent of the reed. Repeat this process for each warp thread, working your way across the loom.
Setting the Tension
Once you've threaded the warp threads through the heddles and the reed, it's time to set the tension. The tension of the warp threads is important, as it affects the quality and appearance of your fabric.
To set the tension, you'll need to adjust the tensioning device on the loom. This is usually a lever or a screw that allows you to tighten or loosen the warp threads. Start by tightening the tension a little bit at a time, checking the tension of the threads as you go. You want the threads to be tight enough to hold their shape, but not so tight that they break.
Loading the Shuttle
The shuttle is the device that carries the weft thread back and forth across the loom. To load the shuttle, you'll need to wind the weft thread onto a bobbin. Make sure the bobbin is filled evenly and that there are no knots or tangles in the thread.
Once you've loaded the bobbin onto the shuttle, you're ready to start weaving. To start weaving, insert the shuttle into the shed, which is the space between the warp threads. Then, use the pedals or the hand crank on the loom to move the shuttle back and forth across the loom, interlacing the weft thread with the warp threads.
Making Adjustments
As you start weaving, you may need to make some adjustments to the loom. This could include adjusting the tension of the warp threads, changing the speed of the loom, or adjusting the position of the heddles.
If you're having trouble getting the fabric to weave evenly, try adjusting the tension of the warp threads. If the fabric is too loose, tighten the tension a little bit. If the fabric is too tight, loosen the tension a little bit.
If you're having trouble getting the shuttle to move smoothly across the loom, try adjusting the speed of the loom. You may also need to lubricate the moving parts of the loom to reduce friction.
Maintenance and Care
Once you've finished weaving, it's important to take good care of your loom. This includes cleaning the loom regularly, lubricating the moving parts, and storing the loom in a dry, cool place.
To clean the loom, use a soft brush or a vacuum cleaner to remove any dust or debris from the surface of the loom. You can also use a damp cloth to wipe down the loom, but make sure you dry it thoroughly afterwards.
To lubricate the moving parts of the loom, use a light oil or a silicone spray. Apply the lubricant to the moving parts of the loom, such as the pedals, the hand crank, and the shuttle. Make sure you wipe off any excess lubricant to prevent it from getting on your fabric.
Conclusion
Setting up a textile loom may seem like a daunting task at first, but with a little patience and practice, you'll be weaving beautiful fabric in no time. Remember to take your time, follow the instructions carefully, and make any adjustments as needed. And if you ever run into any problems, don't hesitate to reach out for help.
As a textile loom supplier, I'm here to support you every step of the way. Whether you need advice on choosing the right loom for your needs, help with the setup process, or maintenance tips, I'm just a message away. So, if you're interested in purchasing a textile loom or have any questions, feel free to contact me. I'd be more than happy to assist you with your procurement and have a detailed discussion about your requirements.
References
- Textile Machinery Handbook
- Weaving Basics: A Guide for Beginners
Send Inquiry